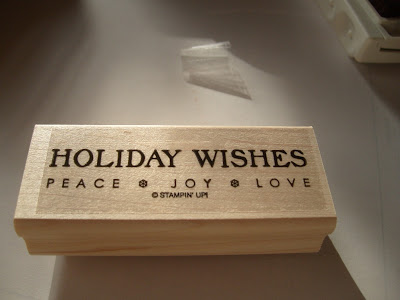
This is second post today, so scroll down for today's card sample :)
Few people have asked me how do I mount my stamps using the stamp-a-ma-jig. I like my stamps being mounted perfectly, and the placement of the sticker to be exactly where the placement of the rubber is. So here is the tutorial.
SUPPLIES:
stamp-a-ma-jig and imaging sheet
ink pad
your unmounted stamps
tape or SNAIL
baby wipes, or wet paper towel(if you don't want to get your fingers all inky, and to clean the imaging sheet)
 1. First you will need to mount your rubber to the wood block, I used a die cut stamp set (from the County Living set, which is NOW available for purchase)
 2. Then of course ink your stamp (notice that the sticker is not on top :))
 3. Position your imaging sheet on the stamp-a-ma-jig and then stamp with the stamp (like you do when you use the stamp-a-ma-jig to stamp on your projects.


 4. Now take a piece of tape and roll it (to make double sided tape), or you can use a little bit of SNAIL or double sided tape, and put it on the sticker sheet on the image which is on your wood block( the stamp you are in process of mounting)

 5. Take your imaging sheet and line the image on top of the sticker and press down with the baby wipe and wipe the ink in the same time (so it doesn't get on your fingers) .
 6. Now carefully pull the imaging sheet with the taped sticker on it, you may need to pill off the sticker edges with your fingers, but be careful the sticker to stay at same place on the imaging sheet.
Few people have asked me how do I mount my stamps using the stamp-a-ma-jig. I like my stamps being mounted perfectly, and the placement of the sticker to be exactly where the placement of the rubber is. So here is the tutorial.
SUPPLIES:
stamp-a-ma-jig and imaging sheet
ink pad
your unmounted stamps
tape or SNAIL
baby wipes, or wet paper towel(if you don't want to get your fingers all inky, and to clean the imaging sheet)
 1. First you will need to mount your rubber to the wood block, I used a die cut stamp set (from the County Living set, which is NOW available for purchase)
 2. Then of course ink your stamp (notice that the sticker is not on top :))
 3. Position your imaging sheet on the stamp-a-ma-jig and then stamp with the stamp (like you do when you use the stamp-a-ma-jig to stamp on your projects.

 4. Now take a piece of tape and roll it (to make double sided tape), or you can use a little bit of SNAIL or double sided tape, and put it on the sticker sheet on the image which is on your wood block( the stamp you are in process of mounting)
 5. Take your imaging sheet and line the image on top of the sticker and press down with the baby wipe and wipe the ink in the same time (so it doesn't get on your fingers) .
 6. Now carefully pull the imaging sheet with the taped sticker on it, you may need to pill off the sticker edges with your fingers, but be careful the sticker to stay at same place on the imaging sheet.


Comments
Post a Comment